I have never met a carrot cake I could refuse (see here and here and here). I am also an unapologetic cupcake lover. You may remember my cupcake fixation of last summer and the regular Friday visits to the IcedGems cupcake truck that parks outside my office (see here and here and here). Part of this weekly habit included lengthy discussions with the IcedGems employee within about the merits of carrot cake. Even though I gave up the cupcake habit several months ago, I walked out to the truck last week with a colleague. And, even though I didn't buy anything, I did pitch my weekly appeal for carrot cake.
This week, my efforts paid off. As I strolled past the truck during my lunchtime outing, I spotted on the menu the long awaited carrot cake.
A few moments and about $3 later (the price was recently increased), I had my IcedGems carrot cake in hand. The guy in the truck let me know that my persistance was one of the reasons for the carrot cake addition. He says that the owners of IcedGems take their customers' options very seriously and value their high regard. I have to admit I find this to be a sound business practice, especially since they decided to agree with me.
Back at my desk, I lapsed into another "bad" habit and promptly wipped out the iPhone to take some photos, and my apologies for the poor quality. It's unfortunate that my current life prohibits me from taking the Canon 7D everywhere. Believe me, I would if I could.
The cupcake was much smaller than usual, but the exterior looked as appealing and promising as always. It was crowned with a perfect dollop of icing and an attractive garnish. I liked that they substituted sprinkles for the more traditional icing carrot, too, for the whimsical aesthetic it presents - very much in keeping with their overall image.
Now, after months of customer devotion to these guys, and a consistent level of satisfaction, my expectations were pretty high. I was braced for a little disappointment when the guy in the truck warned me of the raisins at the time of purchase. Even so, I was not prepared for the sheet volume of raisins - both regular and golden - that filled the cupcake. That, combined with a very coarse grate of carrot, made for a less than satisfying carrot cake experience for several reasons:
IcedGems is still my favorite guilty pleasure. I will continue to bring my coworkers out to their truck on Friday afternoons. As I recover from the endless January flu, I'll probably break a couple of Resolutions and resume my Friday habit.
I'm also quite happy that they presented me with a carrot cake option today. There are few things as valuable as a business that listens to their customers. IcedGems is not only a superlative bakery, but a contientious business and a vital component of the Baltimore food scene.
This week, my efforts paid off. As I strolled past the truck during my lunchtime outing, I spotted on the menu the long awaited carrot cake.
A few moments and about $3 later (the price was recently increased), I had my IcedGems carrot cake in hand. The guy in the truck let me know that my persistance was one of the reasons for the carrot cake addition. He says that the owners of IcedGems take their customers' options very seriously and value their high regard. I have to admit I find this to be a sound business practice, especially since they decided to agree with me.
Back at my desk, I lapsed into another "bad" habit and promptly wipped out the iPhone to take some photos, and my apologies for the poor quality. It's unfortunate that my current life prohibits me from taking the Canon 7D everywhere. Believe me, I would if I could.
The cupcake was much smaller than usual, but the exterior looked as appealing and promising as always. It was crowned with a perfect dollop of icing and an attractive garnish. I liked that they substituted sprinkles for the more traditional icing carrot, too, for the whimsical aesthetic it presents - very much in keeping with their overall image.
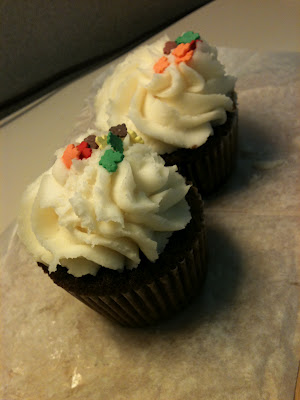 |
| The promise of impending satisfaction |
Now, after months of customer devotion to these guys, and a consistent level of satisfaction, my expectations were pretty high. I was braced for a little disappointment when the guy in the truck warned me of the raisins at the time of purchase. Even so, I was not prepared for the sheet volume of raisins - both regular and golden - that filled the cupcake. That, combined with a very coarse grate of carrot, made for a less than satisfying carrot cake experience for several reasons:
- All that fruit weighs down the cake batter and prevents the normal leavening that occurs during the baking process. You end up with a short, squat cake that is missing that delectable golden mound of cake rising up out of the cupcake paper. If it's the best part of the muffin, it's certainly the best part of the cupcake.
- It also interferes with the texture of the cake and weakens the crumb. Usually when I get a cupcake, I break off the top. This is partly to test the texture of the cake, and partly because it makes it easier to eat. A good cupcake should have a nice separation point just below the mark left by the paper cup, leaving two complete halves. Some crumb is nice, but a crumble is a sign of a dry cake. The IcedGems carrot cake did not want to separate. It took great care on my part to remove the crown without destroying it altogether. This is what too much stuff can do to a cake.
- It mutes the wonderful flavor of what is usually a very nice cake. Similar to the CakeLove carrot cake, the IcedGems carrot cake was just plain overstuffed. Which is unfortunate because they really do make the best cake in town. And the actual cake part of their carrot cake was excellent. It was spicy with nutmeg and cinnamon and what tasted like a hint of ginger and was the most perfectly-spiced carrot cake I've ever had.
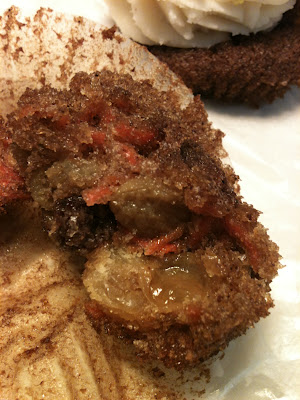 |
| There's more raisin than cake |
The icing was also spot-on - dense and tangy with cream cheese that coated the inside of my mouth and clung to my teeth as they cried out in agony. This slightly-tart, supremely-sweet icing was the perfect complement to their wonderfully-earthy, perfectly-spiced cake.
IcedGems is still my favorite guilty pleasure. I will continue to bring my coworkers out to their truck on Friday afternoons. As I recover from the endless January flu, I'll probably break a couple of Resolutions and resume my Friday habit.
I'm also quite happy that they presented me with a carrot cake option today. There are few things as valuable as a business that listens to their customers. IcedGems is not only a superlative bakery, but a contientious business and a vital component of the Baltimore food scene.